Move it or lose it! Here’s a safe way to lubricate your joints so they stay healthy as you age. Try our 6 poses, plus chair yoga.

Just like good oral hygiene prevents tooth decay, simple yoga poses practiced daily can help you have healthier joints as you age. And even if you are already experiencing some joint pain, you can improve the health of your joints with certain poses.
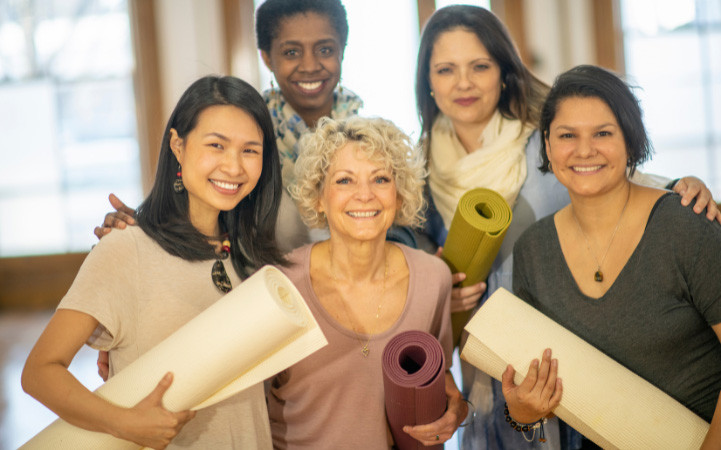
In fact, yoga is perfect for those who suffer from joint pain. Yoga is a low-impact exercise that can be adapted to fit your individual needs. Whether you desire a gentle yoga practice or one that is more vigorous and still avoids placing pressure on the knees, yoga meets you where you are. Yoga can even be done in a chair!
Obviously, the earlier you start the better. Let’s look at some simple yoga poses to keep your joints healthy.
Yoga poses for joint health

Always listen to your body, and never strain with any yoga pose. It is also important to keep breathing as you stretch.
Breathing will help you avoid straining, and extend any posture, enabling a better stretch. Ocean breath is especially helpful in any yoga practice.
You can also make use of yoga blocks, cushions, walls, and other support while practicing these poses to avoid straining.
If you suffer from severe arthritis pain like knee osteoarthritis or rheumatoid arthritis, please seek the advice of your healthcare practitioner before undertaking any yoga practice.
Warrior pose

Stand straight with your legs wide apart at a distance of at least three to four feet
Turn your right foot out by 90 degrees and your left foot in by about 15 degrees
Lift both arms sideways to shoulder height with your palms facing upwards
Breathing out, bend your right knee
Checkpoint: Are your right knee and right ankle forming a straight line? Ensure that your knee does not overshoot the ankle.
Turn your head and look toward your right hand
As you settle down in the yoga posture, stretch your arms further
Make a gentle effort to push your pelvis down
Checkpoint: Hold the yoga posture with the determination of a warrior and SMILE!
Keep breathing as you keep your right knee bent
Breathing in, gently straighten your right knee and come up
Breathing out, bring your hands down from the sides
Repeat the yoga posture for the left side (turn your left foot out by 90 degrees and turn the right foot in by about 15 degrees)
Bow pose

- Lie on your stomach with your feet hip-width apart and your arms by the side of your body
- Bend your knees and reach back to take hold of your ankles
- Breathing in, lift your chest off the ground and pull your legs up and back
Checkpoint: Look straight ahead with a smile on your face. Curve your lips to match the curve of your body!
- Keep the pose stable while paying attention to your breath
- Your body is now taut as a bow
Checkpoint: Continue to take long deep breaths as you relax in this pose. But don’t get carried away! Do not overdo the stretch.
- After about 15 seconds, as you exhale, gently bring your legs and chest to the ground
- Release your ankles and relax
Bow pose opens the shoulders and increases flexibility in the back. Regularly practicing bow pose can lead to the relief of lower back pain.
Bridge pose

- To begin, lie on your back
- Bend your knees and place your feet hip distance apart on the floor, with knees and ankles in a straight line
- Keep your arms beside your body, palms facing down
- Inhaling, slowly lift your lower back, middle back and upper back off the floor
- Gently roll in the shoulders
- Touch the chest to the chin without bringing the chin down, supporting your weight with your shoulders, arms, and feet
- Feel your bottom firm up in this pose
Checkpoint: Both the thighs are parallel to each other and to the floor. If you wish, you can interlace your fingers and push your hands on the floor to lift your torso up a little more, or you can support your back with your palms.
- Keep breathing!
- Hold the posture for up to a minute, and exhale as you gently release the pose
Bridge pose helps strengthen the muscles around the knees, and is also helpful for those suffering from osteoporosis. It calms the brain and reduces anxiety and stress in the body.
Triangle pose

- Stand straight and separate your feet comfortably wide apart (about three to four feet)
- Turn your right foot out 90 degrees and left foot in by 15 degrees
- Now align the center of your right heel with the center of the arch of your left foot
- Inhale deeply, and as you exhale, bend your body to the right, downward from the hips, keeping the waist straight, allowing your left hand to come up in the air while your right hand comes down towards floor
- Keep both arms in straight line
- Rest your right hand on your shin, ankle, or the floor outside your right foot, whatever is possible without overextending the sides of the waist
- Stretch your left arm toward the ceiling in line with the tops of your shoulders
Checkpoint: Keep your head in a neutral position, or turn it to the left, eyes gazing softly at the left palm.
- As you inhale, come up, bring your arms down to your sides, and straighten your feet
- Repeat the same on the other side
The triangle pose strengthens the legs, knees, and ankles. It also stretches and opens the hamstrings, groin, and hips. This yoga pose can help relieve the body of sciatica and back pain.
Camel pose

- Kneel on your yoga mat and place your hands on the hips
- Your knees should be in line with the shoulders, and the soles of your feet should be facing the ceiling
- As you inhale, draw in your tail-bone towards the pubis as if being pulled from the navel
- Simultaneously, arch your back and slide your palms over your feet until the arms are straight
Checkpoint: Do not strain or flex your neck but keep it in a neutral position.
- Stay in this posture for a couple of breaths
- Breathe out and slowly come back to the initial pose
- Withdraw your hands and bring them back to your hips as you straighten up
An effective back pain exercise and shoulder strengthening pose, camel pose increases the flexibility of the spine, improves posture, and relieves low back pain.
Dolphin plank

- Begin in downward-facing dog and slowly shift the weight of the body to the front
- Ensure that your shoulders are aligned with your wrists
- Slowly lower your arms until your forearms touch the floor
Checkpoint: Your palms should be pressing into the floor.
- Keeping your legs straight, position your heels directly above the toes
- Fix your gaze on the floor, and keep your back and knees straight
Checkpoint: If possible, the palms should be facing each other.
- As you inhale, slowly pull your abdominal muscles in, then relax them as you exhale
- Stay in this posture for a few breaths before returning to downward-facing dog
Dolphin plank pose stretches the shoulders and hamstrings, and strengthens the wrists, arms, and legs.
To help you get started with a regular practice check out our online yoga classes.
Yoga practice for joint pain

You don't need a yoga mat for subtle yoga or chair yoga, which can help lubricate the joints, reduce joint pain, and gain other yoga benefits.
- Simple movements like wrist or ankle rotations can increase synovial fluid for greater mobility with less pain.
- Sitting with knees bent, gently swing the lower legs forward and back. This will help lubricate the knee joints.
- A spinal twist can easily be practiced in a chair.
- Shoulder shrugs and shoulder rotations can benefit shoulder joints.
- Neck rotations help alleviate pain in both the neck and shoulder area.
If pain increases while doing any yoga, even subtle yoga, discontinue the practice and seek medical consultation before resuming.
Increase your overall health with breathing exercises
To learn more about how breathing can improve your overall health, we invite you to attend a free online session about SKY Breath Meditation. The free session includes learning a breathing exercise. Just click on the image below to sign up today.


