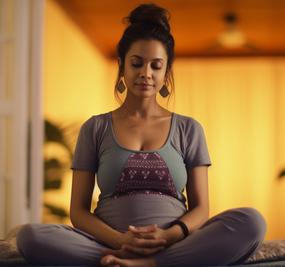
Pregnancy is an incredibly special time in a woman’s life. Creating life and carrying another soul inside your body for nine months gives new meaning to your life, and might even be giving you strength to cheerfully bear the long list of complaints that pregnancy often brings.
With the onset of the third trimester, extra weight may be causing a considerable discomfort. The pressure of your large belly on the internal organs may result in heartburn, frequent urination, lower back pain, cramping in the front and side abdominals, shortness of breath, interrupted sleep, difficulty moving, and clumsiness. You might have unstable joints due to the hormone relaxin, which allows your pelvis to widen so that you can deliver, and you may experience dizziness as well as swelling in the hands and feet because of slowed circulation caused by the hormone progesterone.
As the third trimester progresses, prenatal yoga may become more difficult (just like walking up the stairs, tying your own shoes, and turning over in bed). Your belly becomes a real factor to consider, as does general tiredness and feeling cumbersome. If you were able to practice yoga with some vigor in the second trimester, give yourself the permission to ease up now. Take an increasingly cautious approach as your due date nears, but there is no reason to stop practicing prenatal yoga as long as you feel up to it. Practicing restorative yoga poses during this period can help relieve fatigue, insomnia and water retention.
6 Tips for yoga practice during second trimester
1. Accept and respect your new shape and size. Don’t get annoyed over your inability to do your favorite poses, but instead adjust your yoga practice to your new body shape and size. Make sure you have extra support in case a pose becomes difficult.
2. Use your practice to create more space for your baby. In the third trimester, the work of yoga is to make space in your body for your baby. Doing poses that create a sense of openness, like chest openers and hip openers, will help not only during this time but also for the final event – birthing. These poses also help you open up mentally to accommodate every change that your body is undergoing during pregnancy.
3. Add an extra dose of balancing asanas. Balancing postures will make you feel lighter and more aligned, but you need to be careful to do them near a wall or chair. The extra weight and your protruding belly will likely challenge your balance in every posture, and require modifications and props.
4. Avoid inversions, backbends, and intense abdominal work. Many of these poses will be impossible, given your new shape and weight. Don’t overextend your already stressed joints and ligaments, especially in the torso.
5. Emphasize pranayama over asana. In the last trimester, you used your asana practice to be present with your baby. Now, intense focus and poise are the essential skills to cultivate in your practice. Include hip and chest openers, balancing postures, and relaxation poses in the practice, but add meditation and a lot of pranayama (breathwork) in preparation for labor. Use your breath to connect with your baby. Feel your breath feeding and fueling your baby, and use the practice to feel strong, centered, and grounded.
6. Favor lying on your side over lying on your back. Avoid lying on your back, as this can put pressure on your inferior vena cava (the vein that returns blood from the legs to the heart) and reduce blood flow to your uterus. It can also make you feel dizzy and cause shortness of breath and nausea. Use a bolster or pillows to raise your upper body when you’re lying down, or limit the time you’re flat on your back to one minute, and roll over onto your side for 30 seconds between each exercise on your back. Use pillows to raise your upper body when you’re lying down.
7. Eat a diet high in Calcium. In the last months of pregnancy, calcium is released from the bones to provide for the baby, so increasing dairy, soy, greens and seaweed is essential. Evidence of low calcium can be seen in muscular cramping, especially in the lower legs, and most commonly experienced in the last trimester when the baby’s bones are becoming rapidly denser. Natural food sources of calcium include dairy products, soy products, nuts, seaweed and kelp products, wheat germ and wheat bran. Include these in your daily diet, and you will be on your way to a more healthier childbirth. Raising the level of energy while also helping in slowing the metabolism to restore calm and focus.
Yoga poses during third trimester (28 weeks – till birth)
1. Kantha and Skandha Sanchalana
Roll your head back and forth, right and left, and in circles clockwise and counterclockwise along with slow gentle breaths. Similarly, rotate your shoulder blades back and forth, up and down, clockwise and counterclockwise. Do each movement 3-5 times.
Benefits
Do this with soft and easy breaths to releases tension from head, neck and shoulder area.
2. Poorna Skandh Sanchalana
Single Arm Place the right fingertips up on the right shoulder. Slowly rotate the arm and shoulder joint around, as if drawing a large circle with the tip of the elbow. Extend the movement to rotate fully into the shoulder joint. Do this 5 times one way, and then reverse the direction for 5 circles. Repeat on the left side.
Double Arm Raise the arms up, with your fingers on both shoulders. Slowly rotate both the arms together in large circles. Try to stretch the elbows as far back as possible, and try to touch them together at the front. Go 5 times in one direction, and then 5 times in the other.
Breath Inhale when opening the chest as the elbows go backwards, and exhale when the elbows move towards touching at the front.
Benefits
Improves circulation and flexibility in the shoulders and upper back. Releases tension from around the heart and lungs. Encourages better breathing. For mothers-to-be, practice throughout pregnancy, especially in third trimester and after birth, as this exercise helps to stimulate proper function of the mammary glands.
3. Ankle Rotation
Bend the right leg up and place the foot overhanging the left knee. Hold the right toes with the left hand. Steady the right ankle with the right hand. Gently rotate the right ankle around in a large circle, exploring to the very perimeters of movement. Do 10 gentle rotations in each direction, and then 10 rotations in each direction with the other ankle, coordinating the movement with slow, gentle breaths.
Benefits
Good for stiffness and poor circulation in the feet. Helps extend sitting time in meditation postures. Especially useful in case of water retention, cramping, and post-epidural numbness in the feet and legs.
4. Ardha Baddha Konasana
Sit with your legs outstretched. Fold your right leg and place your right foot as far up on the left thigh as possible. Place your right hand on top of your folded right knee. Hold the toes of your right foot with your left hand. While breathing out, gently move your right knee up towards your chest. Breathing in, gently push your knee down towards the floor. Make sure that you are keeping your torso straight. Repeat with your left leg. Slowly practice about 10 up and down movements with each leg.
5. Baddha Konasana
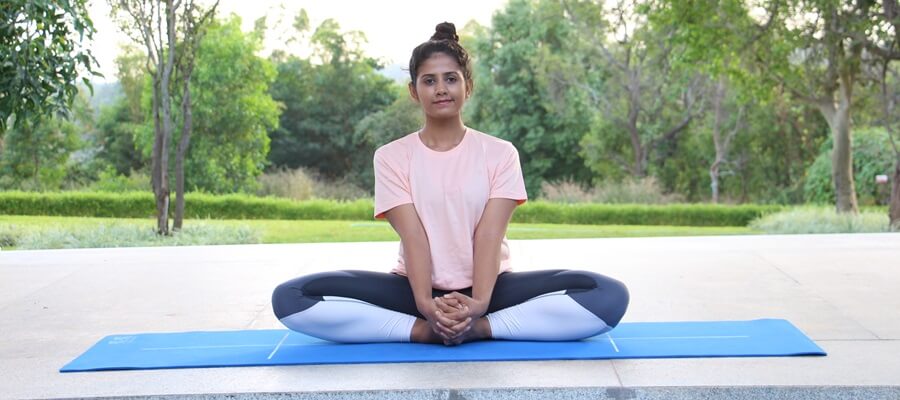
Sit with your legs outstretched. Bend your knees and bring the soles of the feet together, keeping the heels as close to the body as possible. Fully relax your inner thighs. Hold your feet with both hands. Gently bounce your knees up and down, using the elbows as levers to press the legs down. Do not use any force. Repeat up to 20-30 times. Straighten your legs and relax.
Learn more about Baddha Konasana.
Benefits
The half and full butterfly poses are excellent for loosening up the hip joint, and can increase blood circulation to the pelvic floor and help a woman get used to the feeling of opening up. They also help relieve tension and tiredness from inner thigh muscles and legs.
6. Marjariasana
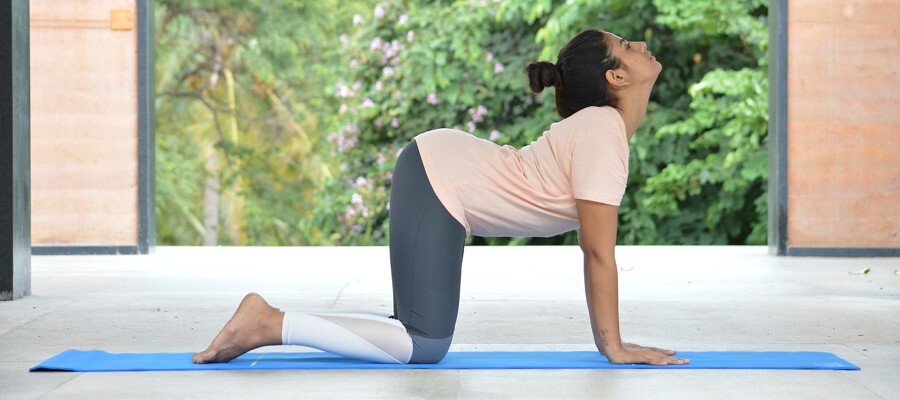
Come onto your palms and knees, with your palms shoulder-width apart below your shoulders, and your knees hip-width apart below your hips. This is the starting position. Inhale while raising your head and gently arching the spine towards the floor. While exhaling, bring your chin towards your chest, and gently arch the spine upward. Repeat for 5-10 times. Be careful not to strain yourself.
Benefits of Marjariasana.
This asan improves flexibility of the neck, shoulders and spine. Tones female reproductive system. It can help shift the baby lower in the uterus and may even encourage proper positioning (head down, face to the back). click here to know more about Marjariasana.
7. Shishu asana or Bal asana
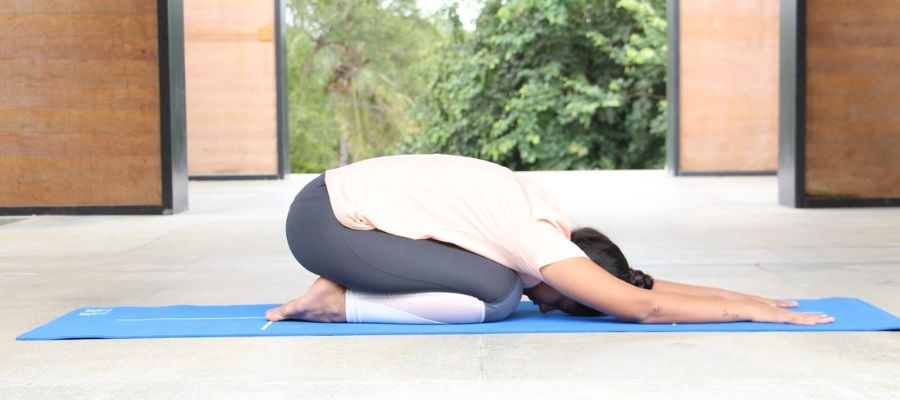
Come back into Vajrasana again, keeping your knees and thighs separate, and gently bend forward, placing your forehead on floor or on the cushion in front. Extend arms forward, palms pressed into the floor. Rest with gentle breaths. If you are not comfortable with this, you can modify it into Puppy Pose by lifting your buttocks up and stretching the hands further.
Learn more about Shishuasana.
Benefits
This is a great shoulder and chest opener and creates a lot of space in the torso.
8. Tadasana
Stand with your feet together and your arms at your side. As you inhale, raise your arms over your head, interlock your fingers, and then turn the palms upward. As you exhale, place your hands over your head. Inhale and stretch your arms, shoulders and chest upwards. Stretch your whole body from top to bottom. While exhaling, bring your hands on top of your head. Relax for few seconds, and repeat the whole round 5-10 times.
Benefits of Tadasana.
Helps develop physical and mental balance. The entire spine is stretched and loosened, helping the back to stretch and relax.
9. Urdhva Hastasana
Stand with your feet together and arms by your sides. Breathing in, extend both arms overhead. Gently stretch up. Breathing out, release the stretch.
Next, extend both arms overhead. Breathing in, gently stretch your right arm longer than your left, and then, breathing out, release the stretch. Breathing in, gently stretch the left longer. Breathing out, release the stretch. Keep alternating between the right and left arms for 5 rounds at a moderate pace. Bring your arms down and relax.
Benefits
Removes stiffness from the shoulders and upper back. The deep, synchronized breath improves breathing capacity. Influences heart and improves blood circulation. The whole body, especially the brain, receives an extra supply of oxygen.
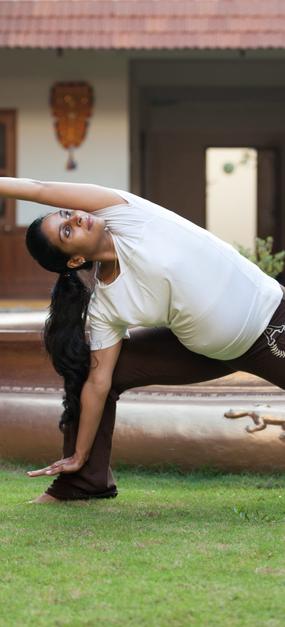
10. Konasana 1 & 2
Breathe in, and raise your left arm. Breathing out, bend to the right, and look up at your left palm. Breathing in, come up. Breathing out, bring the left arm down. Repeat on the other side.
Breathing in, lift your arms overhead and join the palms together, interlacing your fingers to form a steeple position. Breathing out, bend to the right. Hold. Breathing in, return to standing position. Breathing out, bring your arms down. Repeat on the other side.
Benefits
Stretches the sides of body and spine, releasing tension and strain.
11. Trikonasana
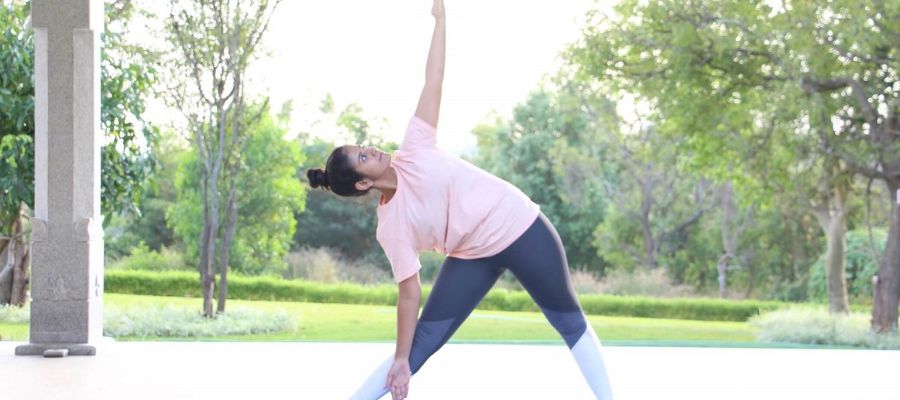
Stand with your feet apart, breathing in, and bring your arms parallel to the floor. Breathing out, extend and bend on your right side to bring the right hand closer to the right foot. Hold. Breathing in, slowly come up, and then relax. Repeat on the other side.
read more about Trikonasana.
Benefits
Stimulates and improves blood circulation through the entire body, relieving aches and pains from back, legs and whole body.
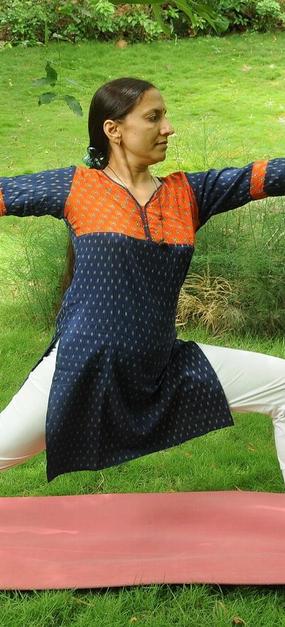
12. Virabhadrasana
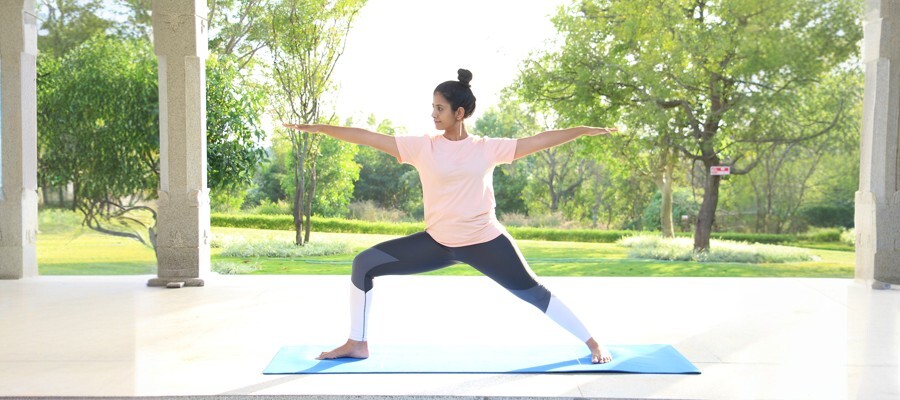
Stand with your feet 3-4 feet apart. Turn the right foot out by 90 degrees, and the left foot in by 15 degrees. Breathing in, lift your arms up to shoulder height. Exhale, and then bend your right knee, keeping it in line with the ankle, and a gently working to bring your right thigh parallel to the ground. Turn the head to the right, and look out across the right hand.
Hold the pose and breathe a few times. Inhale, straighten your right leg, exhale, and bring the arms down. Repeat on the other side.
Benefits of Veerabhadrasana.
Strengthens ankles, knees, shoulders, arms, legs, and back, and energizes whole body while also generating courage and self-confidence.
13. Utthanasan
Stand erect on your feet about a meter apart, with your toes turned out. Interlock the fingers of both hands and let them hang loosely in front of the body. Slowly bend your knees and lower your buttocks. Straighten your knees and return to the upright position. Repeat this 7-10 times.
Benefits
Strengthens the muscles of the middle back, uterus, thighs, and ankles.
14. Supta Baddha Konasana
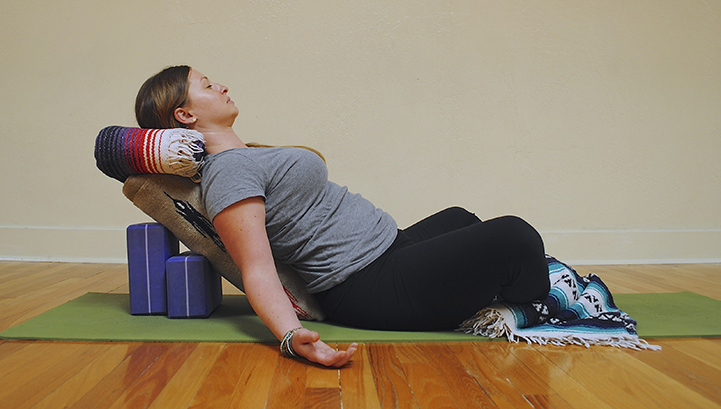
Come into Baddha Konasana (see #5). Place a yoga bolster in a vertical position with one end touching your tailbone. Stack one or two folded blankets at the center of the bolster. Move the upper body, face up, onto the bolster and blanket, and place another folded blanket under your thighs. Relax your arms naturally to the side. You may also place additional blankets under your hands, and put a block between your feet to broaden your pelvis. Stay in this pose for a few minutes with slow gentle breaths and relax. Gently roll to one side to release the posture.
Benefits
Increases blood circulation in the lower abdomen, stretches the groin, and increases external rotation in the hips as it creates space around the pelvis. It also calms and relaxes your anxious mind.
15. Pelvic Tilts
Lie on back, with a bolster below your knees, and stretch your arms above your head. Slowly breathing in, stretch your right arm longer than left. Breathe out, and release. Repeat with your left arm. Turn on your right side for a while, and then come onto your back.
Breathing in, stretch your right arm and right leg longer than your left. Breathe out, and release. Repeat with your left arm and leg.
Turn on your right side for a while, and then come onto your back.
Breathing in, stretch the right arm and left leg longer than the left arm and right leg.
Breathe out, and release. Repeat on the opposite side. Breathe out, and release.
Benefits
Can alternately tone (by lifting) and soften (by lowering) the pelvic floor. Gives you new sense of freedom in your pelvic area.
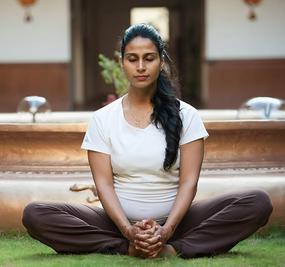
16. Relax with modified Savasana, yoga nidra in modified savasana position followed by pranayama and meditation.
Breath work and relaxation are an essential part of pregnancy yoga, and can be a special time to connect with your baby. Find out here how to make them part of your daily routine.
Lie on the side of your stomach with your fingers interlocked under your cheek. Support the right cheek over the interlocked fingers. Bend the left leg sideways, and bring the left knee close to the ribs.
Your right leg should remain straight. Turn the arms to the left, and try to touch the left elbow on the left knee. If this is not comfortable, simply rest it on the floor. Rest the right side of the head on the right arm. Relax in the final pose, and after some time, change sides. Your bent knee and head may be supported on a pillow for further comfort.
Benefits
Give yourself proper time for savasana. In your third trimester, this posture is ideal for relaxing and sleeping, and also redistributes excess weight around waistline.
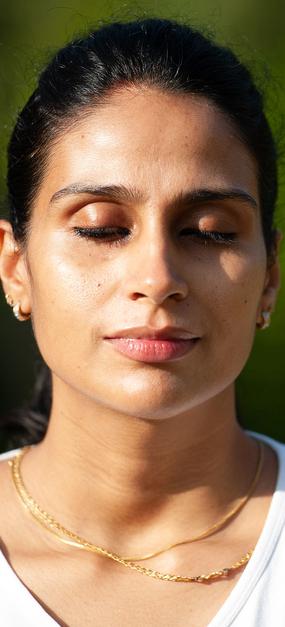
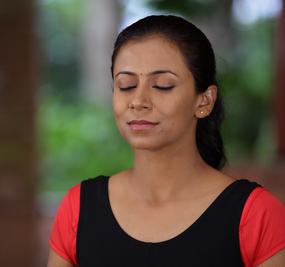
Because of your restricted mobility in the third trimester, your yoga practice has the opportunity to become quieter, with more emphasis on breathwork and meditation and less on asana. In fact, breathwork, or Pranayama, is a crucial part of a third trimester practice. Not only does it encourage relaxation, but it also helps develop the ability to concentrate deeply. It can be done on its own, in a favorite hip-opening position (such as Baddha Konasana – Supported Bound Angle Pose), or you can use your breath during asana practice to develop focus. Meditation practice or Yoga Nidra will take you further, helping you to relax completely and connect with your inner self. If you already have a meditation practice, continue with it, and try practicing immediately after pranayama. Alternate Nostril Breathing before and after your meditation is highly recommended. If you are new to meditation, you may consider learning an easy and effortless technique called Sahaj Samadhi Meditation.
Mental Preparedness: Even more than physically preparing you, yoga will help you prepare mentally for the birth of your baby by teaching you to listen to your body and be in the moment without anticipation. The best way to do this is to focus on your breath, using long inhales and exhales through the nose or exhales through the mouth.
While you’ve probably been envisioning and imaging what life would be with an infant, now is the time most mamas start to shift their attention a bit toward preparing themselves for the indescribable (and often unpredictable) experience of birth and beyond. Maybe you read lots of books or enrolled in a birth education class. These are wonderful things to do. But there’s no better way to prepare both body and mind for birth than a complete yoga practice (including postures, breath, mindfulness practices, meditation, and philosophy study).
The above sequence includes some of the best yoga practices for the third trimester, not just because they can help get your body ready for the physical realities of birth, but also because they can prepare you mentally for whatever might happen. Even if yoga cannot guarantee that you’ll have an easy birth experience (sometimes babies have other plans!), yoga’s focus on letting go and letting things unfold can be a comfort to any mama during the mentally, emotionally, and spiritually intense time of pregnancy and birth.
Happy Birthing!
Yoga and Pregnancy
Pregnancy Yoga: Poses for First Trimester and Second Trimester
This content is not intended to be a substitute for professional medical advice, diagnosis or treatment. Always seek the advice of your physician or another qualified health provider with any questions you may have regarding your pregnancy or associated a medical condition.

By Sejal Shah, E-YRT 500 Yoga Teacher, YACEP, Art of Living Teacher, Mind-Body Wellness Writer, NYU Post Graduate Medical School approved CME retreat facilitator, Homeopath